Steps before starting this Tutorial
What is Redis
Redis is an open-source, in-memory data store used as a cache, database, and message broker, known for its high performance and low-latency data access.
Visit Redis Documentation Website
Create and Configure an ElastiCache Redis Cluster
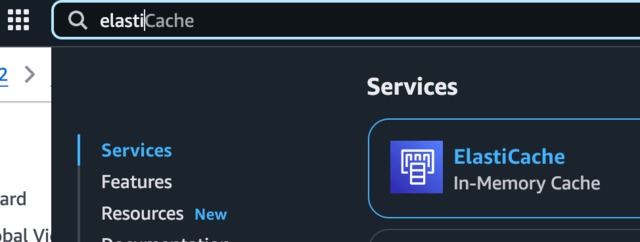
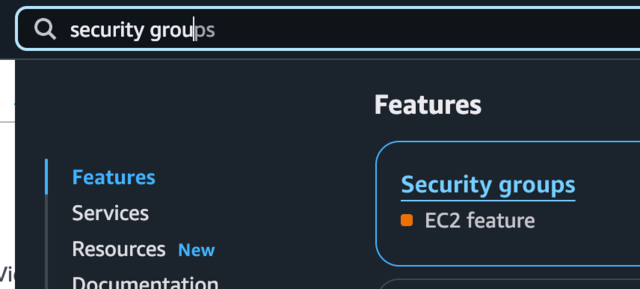
On the upper search bar type ElastiCache, and select from the dropdown ElastiCache service.
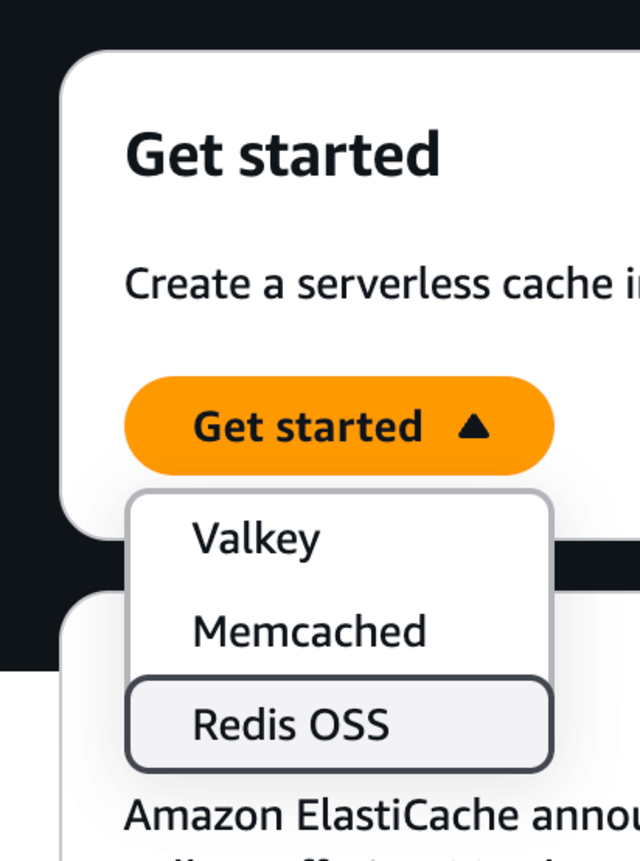
Once on your ElastiCache dashboard, search for Get started orange button and select Redis OSS option.
Start configure your Cluster Redis
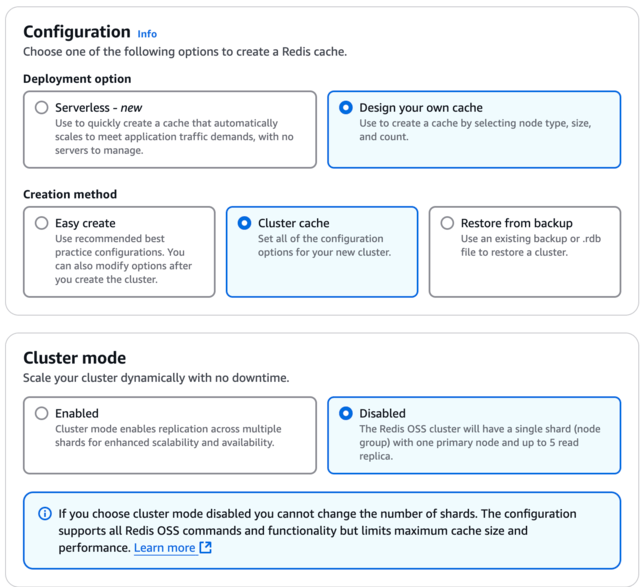
Make sure to select cache.t2.micro for your Node Type, and 0 for Number of replicas, for testing purposes.
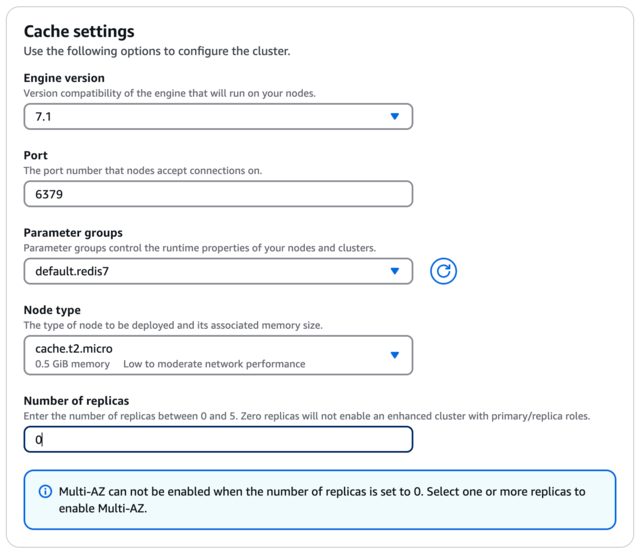
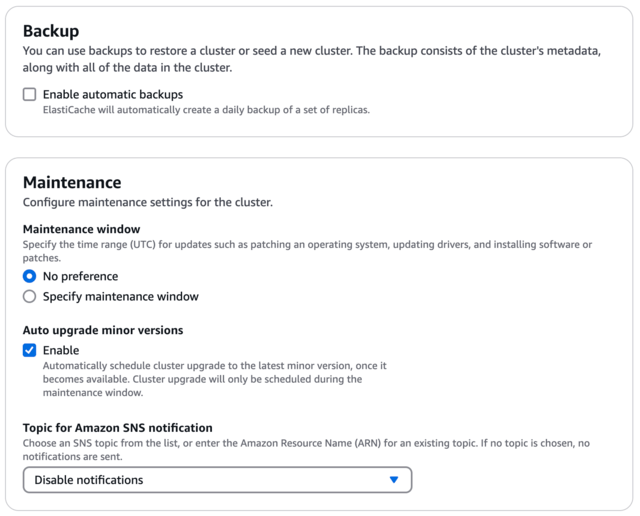
Make sure, for testing purposes, to uncheck Backup enable automatic backups.
Create Redis Cluster Security Group to Allow Inbound EC2 Instance Calls
This process is one of the most important, because this will allow the Redis Cluster for inbound call from the EC2 Instance.
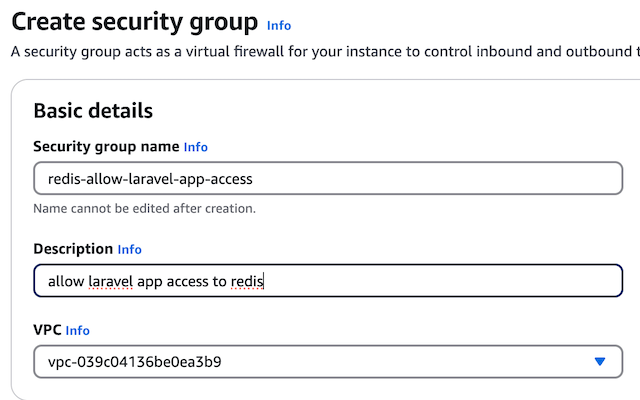
Once the ElastiCache Redis is created, setup and active, we need to create a new security group on the same VPC as our EC2 Instance with an Inbound Rule to allow TCP calls into port 6379 from the security group attached to the EC2 where your Laravel App is hosted.
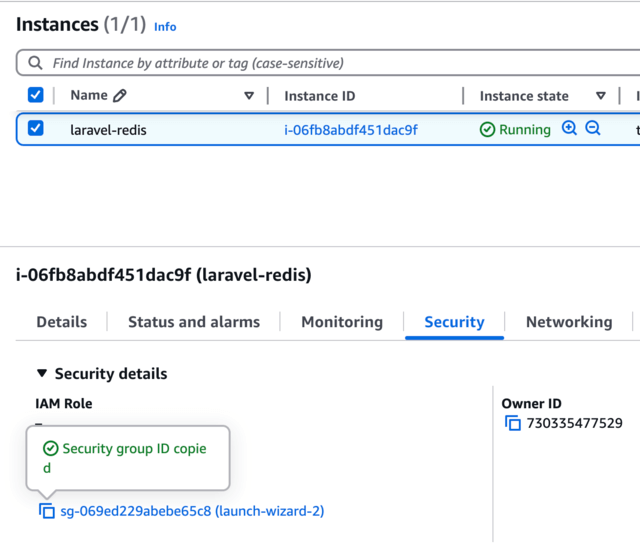
Go to your EC2 Instance, where your Laravel Application is hosted, and copy your security group
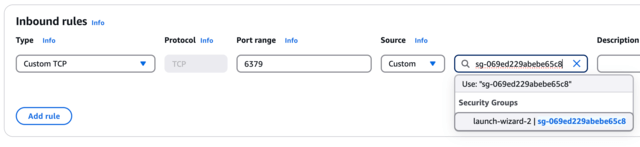
and now, we need to return to our new security group form, paste the recently EC2 security grorup you copied into the source field, this will allows inbound calls to the Redis cluster through port 6379 from the EC2 Instance (Laravel App), this ensures communication between the EC2 instance and the Redis cluster is secure.
Create the new security group and copy the name.
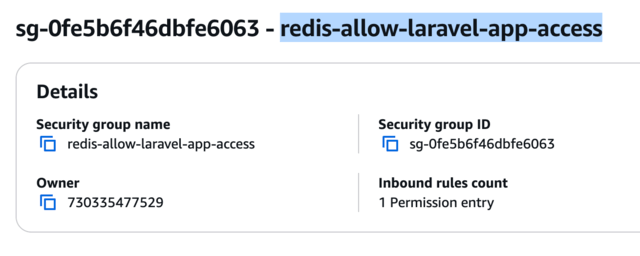
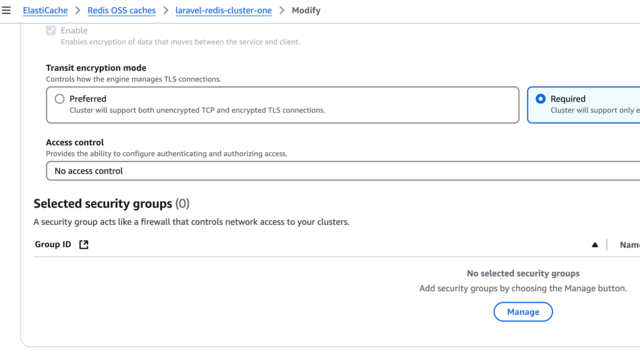
Go to the ElastiCache dashboard and open your Redis Cluster recently created and click Modify button, to edit your cluster, scroll down until Selected security groups section, and click on Manage button.
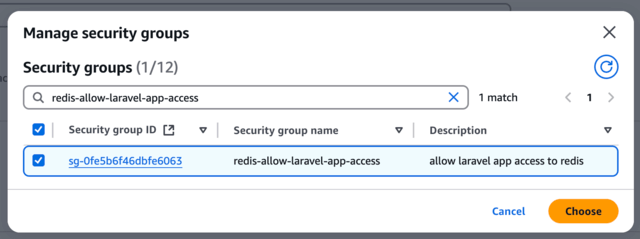
And paste the security group you created redis-allow-laravel-app-access, this will complete the setup to allows inbound calls from the EC2 Instance, Laravel App, to the Redis cluster through port 6379, click con Choose button and update your Redis Cluster.
Now that we have completed our Redis Cluster Setup configuration steps and linked security groups on Redis Cluster to allow calls from EC2, now we need to test that its working as expected.
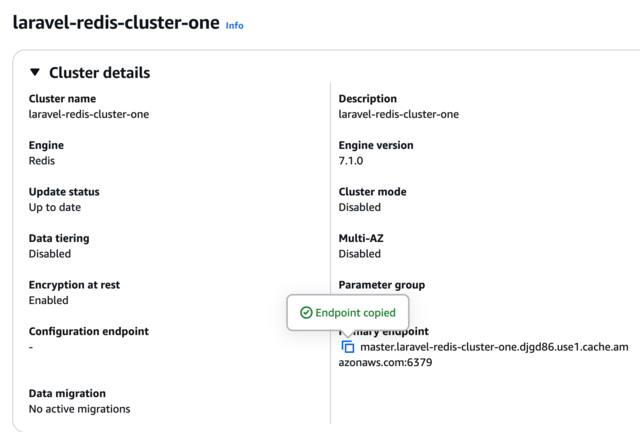
Go to your Redis Cluster details and copy your Primary Endpoint.
Connect to you EC2 Instance via SSH.
ssh -i <ec2-key-file> ubuntu@<ec2-public-ipv4-address>
And connect to your Redis Cluster using redis-cli command as below, which seems everything is working as expected, now we need to configure our .env file.
redis-cli -h master.laravel-redis-cluster-one.djgd86.use1.cache.amazonaws.com -p 6379 --tls
master.laravel-redis-cluster-one.djgd86.use1.cache.amazonaws.com:6379>
Change to your Laravel Application folder open your .env file and update below values accordingly based on your Redis Cluster endpoint for host and port.
CACHE_STORE=redis
CACHE_PREFIX=

REDIS_CLIENT=predis
REDIS_HOST=tls://master.laravel-redis-cluster-one.djgd86.use1.cache.amazonaws.com
REDIS_PASSWORD=null
REDIS_PORT=6379
Now you can refresh your Laravel Application on your EC2 Instance and see the Cache Working as expected, the first time we load our EC2 Instance cache key does not exist but it is created a random 16 chars value.
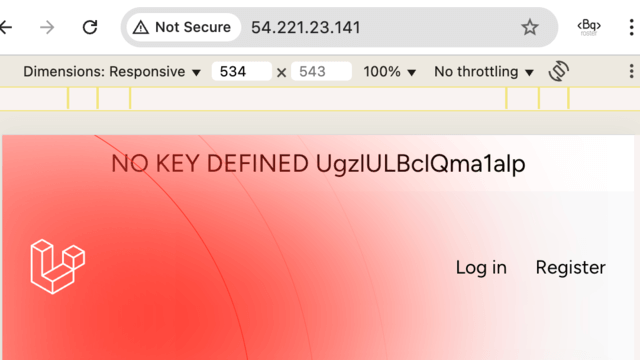
If we refresh NOW Cache Key exists, it is not created, and the value is the same as the one before created.

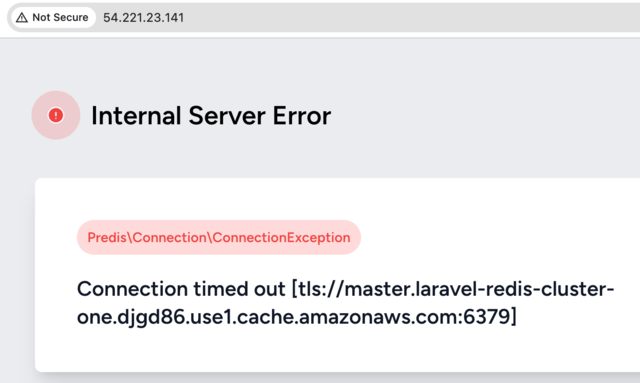
If we open Redis Cluster details and remove the Security Group, just for a second, save and refresh in your browser the Laravel Application, you will get a Connection timed out, this is because the Redis Cluster does not allow inbound calls, we have removed the security group, now you can restore the security group in your Redis Cluster or complete the tutorial and delete the EC2 Instance and the Redis Cluster to avoid billing charges.
Terminate EC2 Instance After tutorial
Once you complete this tutorial if you do not need the EC2 instance and the Redis Cluster anymore, please terminate and remove both of them, so you do not incurr in Billing cost for your Instance, the EBS Volume and the Redis Cluster.
If you only stop the instance, EC2 will NOT incurr in Billing cost, but your EBS Volume will be charged, so the best thing to do is terminate so you will not get any type of Billing charges, also you can create a snapshot of your EBS Volume if you need later, check real quick about how to avoid or eliminate billing charges.
Let me know on my social websites, if you got questions, comments, any positive feedback is always welcome!