In this guide, we'll walk you through the process of setting up an Ubuntu EC2 instance on AWS to host a Laravel application. AWS EC2 provides scalable computing capacity in the cloud, and pairing it with Ubuntu, a stable and popular Linux distribution, offers a robust environment for running web applications.
By the end of this tutorial, you'll have a fully configured EC2 instance with all the necessary software and dependencies for Laravel, including PHP, Composer, Nginx, SQLite and MySQL, ensuring the basic hardware and software setup for you Laravel application.
EC2 Instance Configuration Steps
- Launch an EC2 Instance
- Give your EC2 Instance a Name
- Select your AMI (Amazon Machine Image)
- Select Instance Type
- Select Key Pair (login)
- Setup security group access
- Setup User Data in Advanced Details
Change to EC2 Dashboard and Launch Instance
 From the top search menu select EC2
Once you are login into you AWS Admin account, to change to EC2 Dashboard, from the top search type EC2 you will see a list of services click on EC2 Virtual Servers in the Cloud.
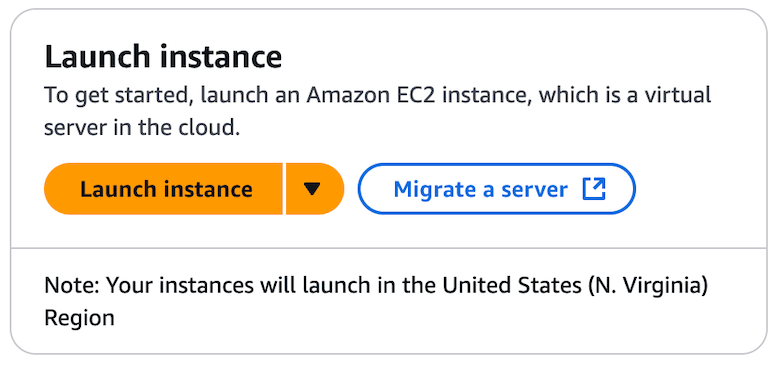
Now that you are on the EC2 Dashboard, on the center of your screen, search and click for an orange button Launch Instance.
EC2 Instance set Name and AMI
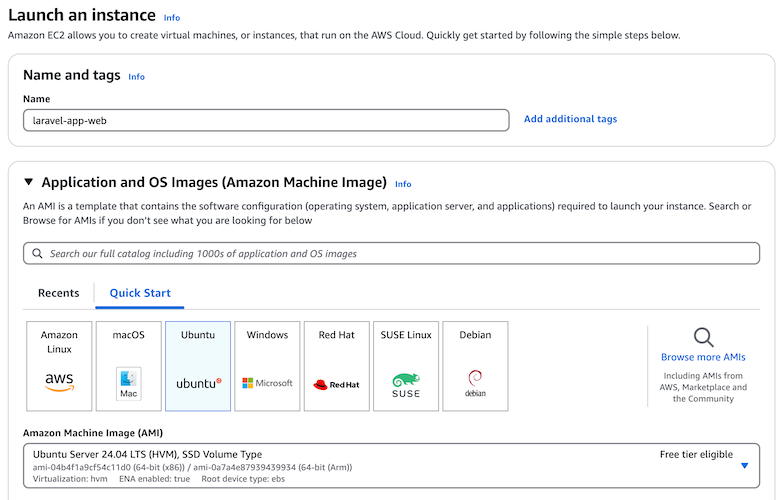
Give your instance a name that describes what it is for, that in the future if you got more than one instance you can easily identify your instance name you need to take action, make sure to select UBUNTU as your AMI.
AWS AMI (Amazon Machine Image) is a pre-configured template used to launch virtual machines. It contains the operating system, application server, and applications needed for a specific use case.
Benefits of using Ubuntu as AMI
Popular & Well-Supported: Ubuntu has strong community and commercial support.
Security: Regular security updates.
Ease of Use: Known for simplicity and user-friendly configuration.
Wide Compatibility: Works well with many software stacks and cloud services.
Free & Open-Source: No cost for the OS itself.
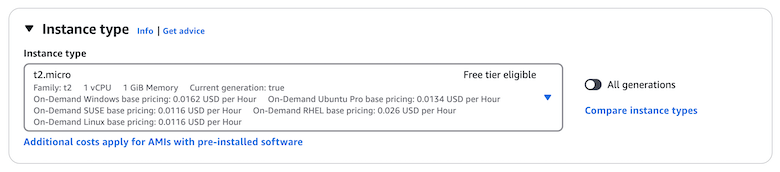
AWS Instance Type
An AWS EC2 Instance Type defines the hardware configuration (CPU, memory, storage, and networking) of a virtual machine (EC2) that will be running on your instance. You can find different type of instances, which are optimized for specific workloads (e.g., compute, memory, storage, etc). Check the list of all AWS EC2 Instance Types in the oficial website.
Select Key Pair (login)
By selecting Key Pair (login), which we strongly recommend to activate it, you enable your EC2 Instance access via SSH.
"The SSH protocol (also referred to as Secure Shell) is a method for secure remote login from one computer to another. It provides several alternative options for strong authentication, and it protects communications security and integrity with strong encryption. "
On the Key pair (login) section, on the right side click on Create new key pair button, it will open a modal window to fill with your Key pair name and the type, by default we recommend to use RSA with `.pem` as format, unless you are using Windows you can select `.ppk` file format.

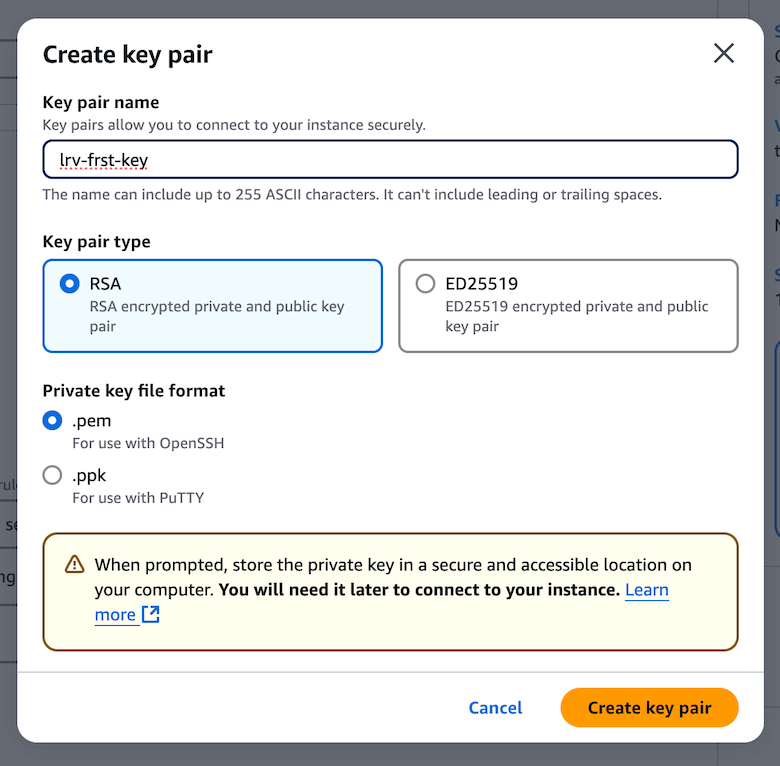
Once you fill all the required values, click on Create key pair button, it will generate the lrvl-frst-key.pem file and will be downloaded to your computer, move this file to your ~/.ssh/ folder.
PEM & PPK difference and usage
PEM (Privacy-Enhanced Mail) and PPK (PuTTY Private Key) are both formats for private keys used for SSH access:
PEM
Standard format used by OpenSSH.
Commonly used for Linux servers and AWS EC2 instances.
File extension: .pem
PPK
Specific format for PuTTY, a popular SSH client for Windows.
Required when using PuTTY to connect to a server.
File extension: .ppk
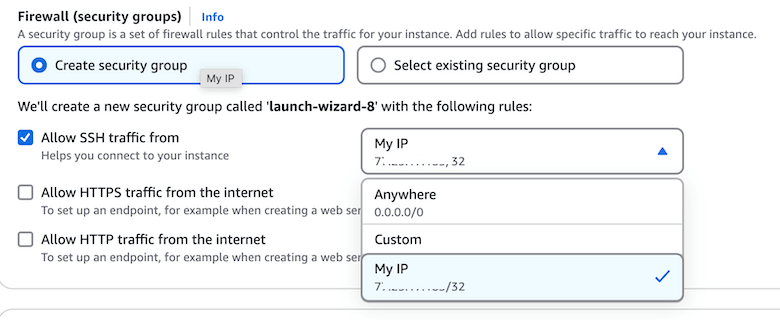
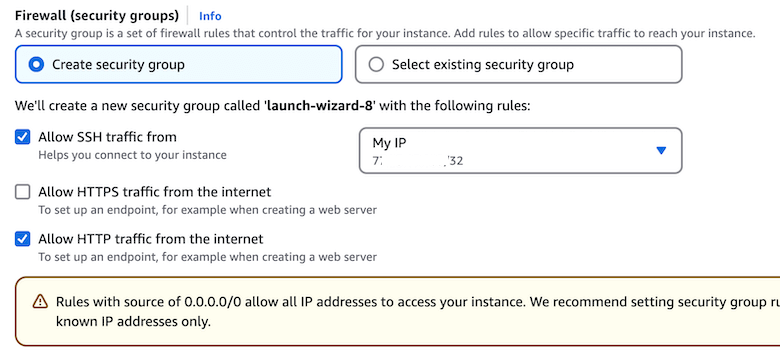
Setup security group access
By default, on Ubuntu, AWS EC2 will create a username ubuntu to access your instance via ssh (check all common usernames on EC2 differentes AMIs).
We strongly recommend to select your SSH trafic only for your IP, selecting My IP option on the right side, by default it will display your IP value. Anyone in another IP address would not be able to access your instance via SSH.
Now, we are almost ready to have our EC2 Instance complete setup before we deploy our first Laravel Application. Now we scroll down to the bottom until we reach section Advanced Details, click to expand, and once again scroll to the bottom until you reach section User data - optional.
User Data in AWS EC2 is a script or configuration provided only executed on instance launch. It allows you to automate tasks like installing software, configuring settings, or running commands when the instance starts for the first time. It can be a shell script or cloud-init script (Linux) or PowerShell script (Windows), in your user data case we are going to use bash shell script.
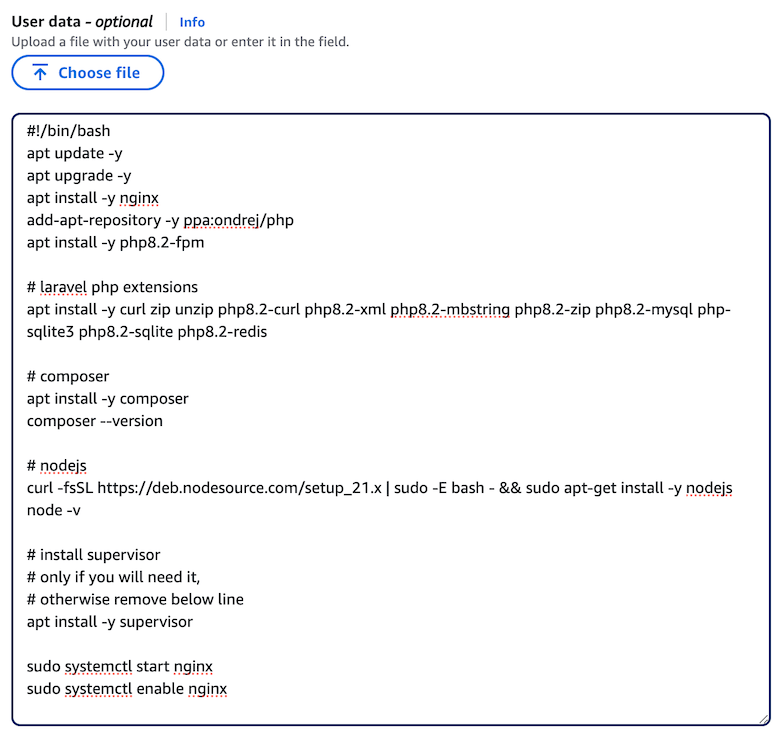
Select and copy below bash code and paste in your User data - optional box
#!/bin/bash
apt update -y
apt upgrade -y
apt install -y nginx
add-apt-repository -y ppa:ondrej/php
apt install -y php8.2-fpm

# laravel php extensions
apt-get install -y curl zip unzip php8.2-curl php8.2-xml php8.2-intl php8.2-mbstring php8.2-zip php8.2-mysql php-sqlite3 php8.2-sqlite php8.2-redis

# composer
apt install -y composer
composer --version

# nodejs
curl -fsSL https://deb.nodesource.com/setup_21.x | sudo -E bash - && sudo apt-get install -y nodejs
node -v

# install supervisor
# only if you will need it,
# otherwise remove below line
apt install -y supervisor

sudo systemctl start nginx
sudo systemctl enable nginx
If there are concerns about the meaning of any of above commands, We have created a detailed line by line article to explain above bash script, check article here.
Now its time to LAUNCH your instance, click on the right side orange button Launch Instance, and now lets wait that AWS create and completes finishing the installation process.
In your EC2 Dashboard will apear your list of instances, wait until the new one have your Instance state in Running, and Status Check also in green.
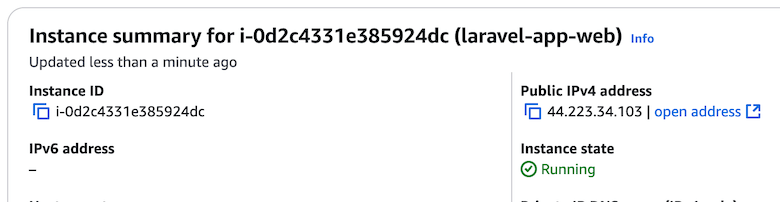
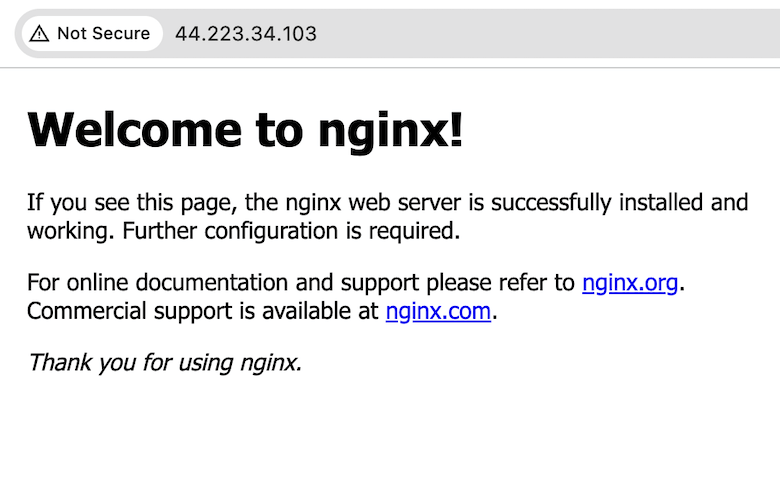
If everything was set correctly, now you can click on the copy icon of the public IPv4 address, open your browser and paste it using http://44.223.34.103, replace this IP for the one you got on your instance, it should display a default NGINX Welcome page.
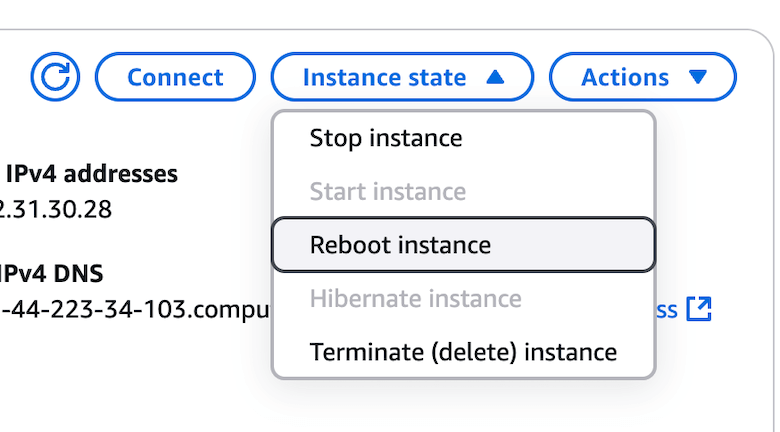
Sometimes, this is not resolving correctly, when browsing the public IP, if that is the case this could be because we also need to reboot the instance.
Click on the Instance State menu and in the dropdown select Reboot instance, and give a couple of seconds that the instance is Running and Status Check is also green.
If you want to double confirm that this process is correct, and ensure that Nginx, PHP, Node and Supervisor are up, running and within the right version installed in your instance, please follow the next link "Connect vía SSH and confirm EC2 instance setup applications"
Terminate EC2 Instance After tutorial
Once you complete this tutorial if you do not need the EC2 instance anymore, please terminate the instance, so you do not incurr in Billing cost for your Instance and your EBS Volume.
If you only stop the instance, EC2 will NOT incurr in Billing cost, but your EBS Volume will be charged, so the best thing to do is terminate so you will not get any type of Billing charges, also you can create a snapshot of your EBS Volume if you need later, check real quick about how to avoid or eliminate billing charges.
Let me know on my social websites, if you got questions, comments, any positive feedback is always welcome!