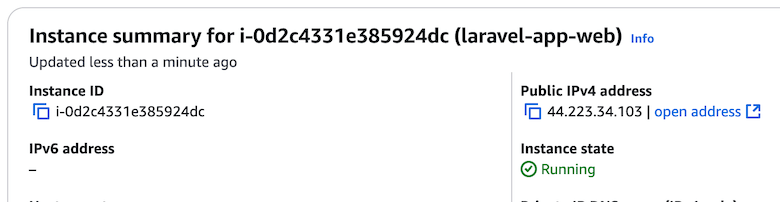
Once you have completed the process of creating a new EC2 Instance and confirm NGINX is running vía Browser, to ensure you have SSH access and all the applications are up and running with the correct version, we need to click on the copy icon from "Public IPv4 address", and open our terminal program (iTerm, PuTTY, etc)
In your terminal window (iTerm, PuTTY, etc), change to the directory where your key file is being downloaded or store, confirm that you give your key file permission only for you, i have already moved my key file to my ~/.ssh/ directory.
chmod 0400 ~/.ssh/lrvl-frst-key.pem
Now you can connect to you EC2 Instance using ssh and your key
ssh -i lrvl-frst-key.pem ubuntu@44.223.34.103
The first time you connect you will be prompted to confirm proceding with current connection, you can type "yes".

After a few seconds, now you are connected to your EC2 Instance, through SSH, now you can confirm that PHP, Node, Supervisor and Nginx are up and running correctly.
# list all the php modules installed
php -m
# composer is running and
# correct version
composer --version
# php is running and with the
# correct version on user data
php -v
# node is running and
# right version
node -v
# supervisor is active and running
sudo systemctl status supervisor
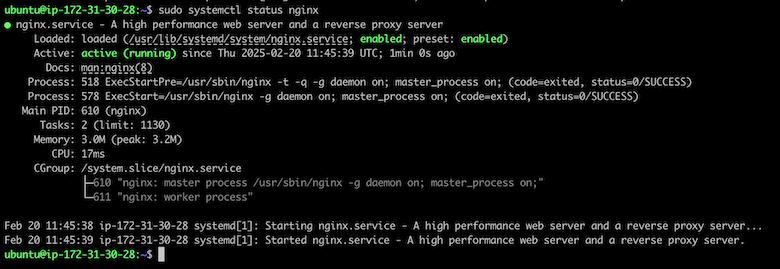
# nginx is active and running
sudo systemctl status nginx
Composer version up & running

PHP version up & running

Node version up & running

Supervisor up & running

Nginx up & running
This confirms that our EC2 Instance user data for Laravel Application was setup correctly, to create a new EC2 Instance user data for Laravel, please follow the next link.
Feedback is always welcome, let me know if this article was useful or how we can improve it.