Steps to Deploy Private Github Laravel App
Once you have launched your EC2 instance and confirm Nginx and software configuration is up and running we need to follow the next steps to deploy your Laravel App and make it public.
Click on the Public IPv4 address Copy Icon of your EC2 Instance you want to SSH.
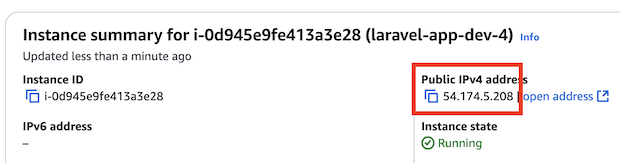
Connect EC2 Instance via SSH
Open your iTerm or PuTTY on your computer and ssh using your file key, previously generated.
ssh -i ~/.ssh/lrvl-frst-key.pem ubuntu@54.174.5.208
# create an user for your laravel app deploy process
sudo adduser laravel_app_dev

# switch to the user created
sudo su laravel_app_dev

# change to the root user directory
cd ~/

# create ssh keys for you laravel app deploy
# leave passphrase blank
ssh-keygen -f ~/.ssh/gh_laravel_app_dev_rsa -t rsa
We need to create a config file under ~/.ssh/ folder to let Github know which keys must use when accessing
nano ~/.ssh/config
Copy below code into the config file
Host github.com
        IdentityFile ~/.ssh/gh_laravel_app_dev_rsa
        IdentitiesOnly yes
Now make sure that your ~/.ssh folder and files have below permissions
# 700 (owner -> read, write and execution for ~/.ssh folder)
chmod 700 ~/.ssh

# 600 (owner -> read and write for ~/.ssh/* files)
chmod 600 ~/.ssh/*
Display, select and Copy the value of your PUBLIC KEY.
cat ~/.ssh/gh_laravel_app_dev_rsa.pub
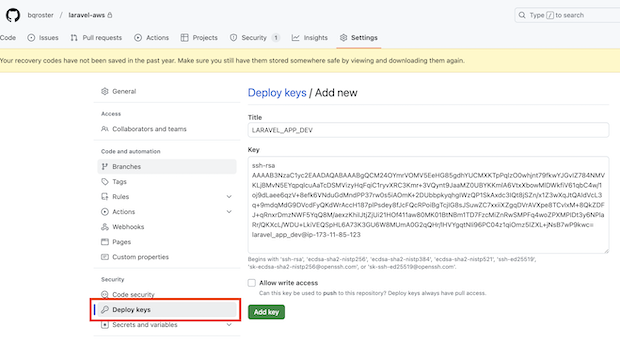
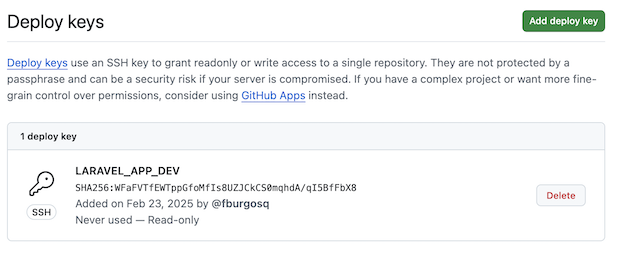
Create Github Deploy Keys with RSA Public Key
Open your Github Laravel App repository, and click on the Settings tab, on the left menu click Deploy keys and on the right click Add deploy key.
Fill title and on the key field, paste the rsa public value that you previously copy, you do not need to check box Allow write access, leave it unchecked, click Add key.
Now click on your Laravel App name repository and change to the main or master branch, and copy the `ssh` link of your repository.
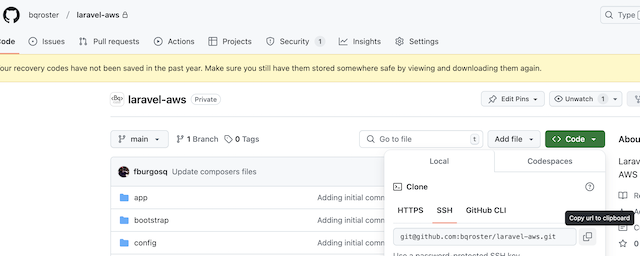
Switch to your iTerm or PuTTY window and clone your repository.
git clone git@github.com:bqroster/laravel-aws.git

# first time you will be prompted to continue connecting...
Are you sure you want to continue connecting (yes/no/[fingerprint])? yes

# git clone success
Warning: Permanently added 'github.com' (ED25519) to the list of known hosts.
remote: Enumerating objects: 156, done.
remote: Counting objects: 100% (156/156), done.
remote: Compressing objects: 100% (119/119), done.
remote: Total 156 (delta 25), reused 153 (delta 22), pack-reused 0 (from 0)
Receiving objects: 100% (156/156), 147.33 KiB | 13.39 MiB/s, done.
Resolving deltas: 100% (25/25), done.
Laravel App is now deployed successful to your EC2 Instance, now you need to complete setup your Laravel App
# change to your laravel app in the EC2 instance
cd laravel-aws

# create environment variables file
cp .env.example .env

# open environment variables file and
# edit all the values that you need on your
# current project
nano .env

# ONLY for testing purposes
# update DB_CONNECTON to sqlite
# and comment all other DB_variables
DB_CONNECTION=sqlite
#DB_HOST=127.0.0.1
#DB_PORT=3306
#DB_DATABASE=laravel_aws
#DB_USERNAME=root
#DB_PASSWORD=

# install all composer packages
composer install

# generate laravel key
php artisan key:generate

# when running migration
# you will be prompted to
# create database/database.sqlite file
# confirm yes
php artisan migrate

# install all dependencies
npm install

# build the assets
npm run build
Steps to make our Laravel App Live
To make our Laravel App goes live, we need to return to our ubuntu user, at this point we cannot user our laravel_app_dev user, this user is created to handle the deployment process but it does not have ROOT permissions to change some Nginx configuratioin to make our Web Application live.
laravel_app_dev@ip-172-31-85-123:~/laravel-aws$ whoami
laravel_app_dev
laravel_app_dev@ip-172-31-85-123:~/laravel-aws$ exit
exit
ubuntu@ip-172-31-85-123:~$ whoami
ubuntu
ubuntu@ip-172-31-85-123:~$
Configure Laravel User and Update PHP Pool config
Check to which group the current user in Nginx Configuration belongs
ubuntu@ip-172-31-85-123:~$ cat /etc/nginx/nginx.conf | grep user
user www-data;

# we need to append/add to your laravel-app-dev user to this www-data group
sudo usermod -a -G laravel_app_dev www-data
Now we need to update our PHP Pool configuration to our user
sudo nano /etc/php/8.2/fpm/pool.d/www.conf
Now you need to search for the pool name and update with your laravel user
; Start a new pool named 'www'.
; the variable $pool can be used in any directive and will be replaced by the
; pool name ('www' here)
[www]

# update [www] for current user
[laravel_app_dev]

# now scroll down and search for these 2 lines and replace for...
user = www-data
group = www-data

# replace above 2 lines with your laravel user
user = laravel_app_dev
group = laravel_app_dev

# scroll down and search for the next 2 lines and replace for...
listen.owner = www-data
listen.group = www-data

# replace above 2 lines with your laravel user
listen.owner = laravel_app_dev
listen.group = laravel_app_dev

# save and exit your file
Create Nginx Config to your Laravel App Folder
The last step is to create a new Nginx configuration or update Nginx default conf file and point it to our Laravel App Folder
To simplify the process we are going to update current default conf
sudo nano /etc/nginx/sites-available/default
Replace current default configuration for below Nginx Laravel Basic configuration
server {
    listen 80 default_server;
    listen [::]:80 default_server;
    server_name _;

    # ONLY REPLACE BELOW LINE FOR THE
    # PATH THAT POINTS DIRECTLY TO YOUR LARAVEL APP public/ folder
    root /home/laravel_app_dev/laravel-aws/public;

    index index.php index.html index.htm;

    charset utf-8;

    # Enable gzip compression
    gzip on;
    gzip_types text/plain text/css application/javascript application/json application/xml text/javascript;

    # Set up Laravel's recommended configurations
    location / {
        try_files $uri $uri/ /index.php?$query_string;
    }

    # Handle .php files (ensure this points to your PHP-FPM socket or service)
    location ~ \.php$ {
        fastcgi_pass unix:/var/run/php/php8.2-fpm.sock;
        fastcgi_index index.php;
        fastcgi_param SCRIPT_FILENAME $realpath_root$fastcgi_script_name;
        include fastcgi_params;
    }

    # Deny access to sensitive files
    location ~ /\.(?!well-known).* {
        deny all;
    }

    # Set appropriate permissions for caching
    location ~* \.(?:css|js|jpe?g|png|gif|svg|ico|woff2?|ttf|eot|otf|webp)$ {
        try_files $uri =404;
        access_log off;
        expires 1y;
        add_header Cache-Control "public, immutable, max-age=31536000";
    }

    # Allow Laravel to serve pretty URLs (Eliminate index.php in URLs)
    location ~ ^/index\.php$ {
        try_files $uri =404;
    }

    # Access and error logs
    access_log /var/log/nginx/laravel_access.log;
    error_log /var/log/nginx/laravel_error.log;
}
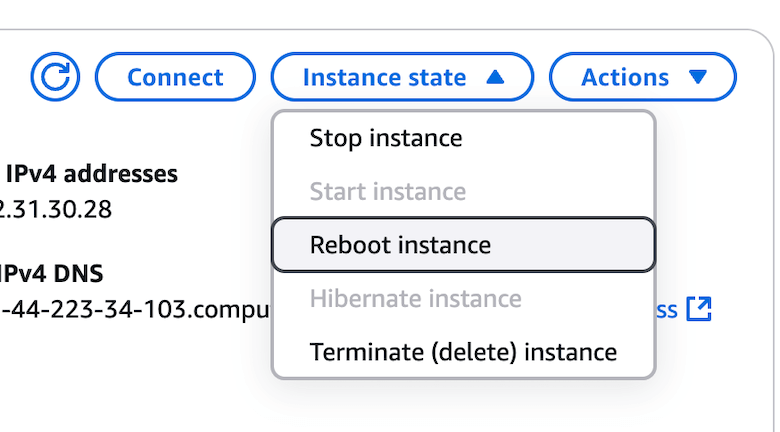
Save the default cong file and exit nano, now it is time for the last steps, reload Nginx and reboot EC2 instance.
sudo service nginx reload
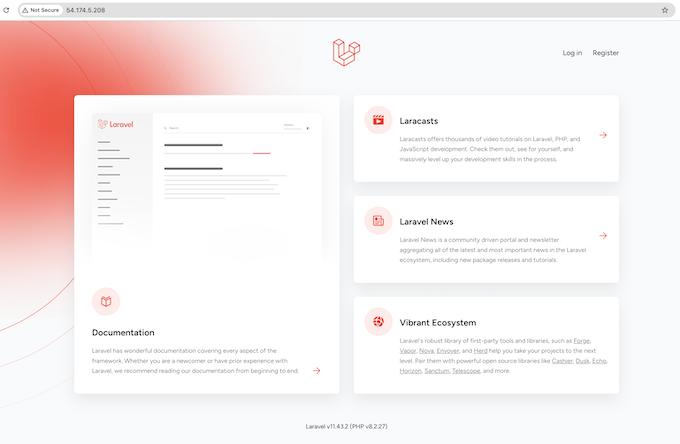
Now you can open your browser and type http://54.174.5.208, only update the IPv4 Address for the one in your EC2 Instance.
Manually process can give us full control and some customization, but this can also can get creating an automatic process, lets summary what would be the Pros and Cons of having manually deploy process.
Pros
- Full control: You manage every aspect of the deployment, including configuration and security.
- Customization: Flexibility to tailor the environment to your exact needs (e.g., server settings, installed packages).
- No third-party dependencies: No reliance on deployment services, meaning fewer risks of external service failures.
Cons
- Time-consuming: Requires manual setup, configuration and maintenance
- Result in Errors: More opportunities for mistakes in configuration or security, especially if you're new to AWS or Laravel.
- Scalability challenges: Scaling the application manually can be complex and require more work compared to automated services.
- Security risks: Improper configuration could lead to security vulnerabilities, and you’re responsible for patching and updates.
Always welcome comments, feedback, concerns that help me to improve this tutorial.