Steps before starting this Tutorial
Setup RDS - MySQL Instance
Once we have Created and configure our EC2 Instance, and had deployed first time our Laravel App, now we need to create a RDS, we are going to use in this Tutorial a MySQL Instance.
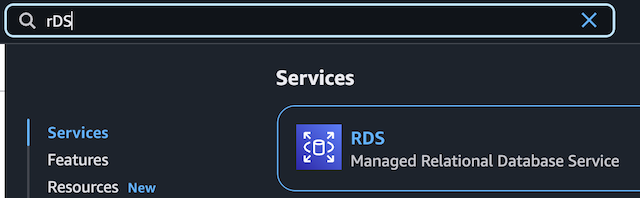
On your AWS Dashboard search input, type RDS and click on the RDS Service, to change to this Relational Database section.
Once on the RDS Dashboard, search and click for Create database button, this will display all the sections to configure our RDS database.
 The first option is the Engine options, for the purpose of this tutorial, select MySQL, Engine version you an select v8.0.40, in the Templates section select Free tier.
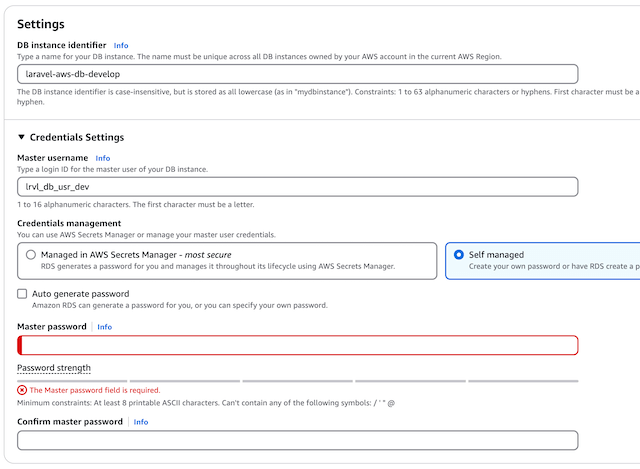
In the Settings section, you need to set DB instance identifier, suggest to add a name that identify which project and environment this database is for, the same I suggest for your Master username and for the last set a strong password.
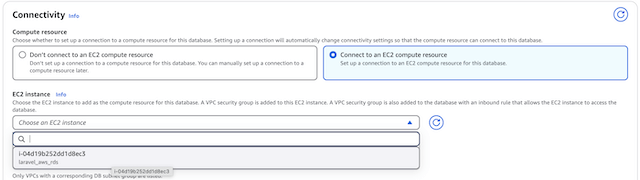
In the Connectivity section, select Connect to an EC2 compute resource, and below on EC2 instance select the EC2 instance that you previously created, ensure that "Public Access" is checked on "No"
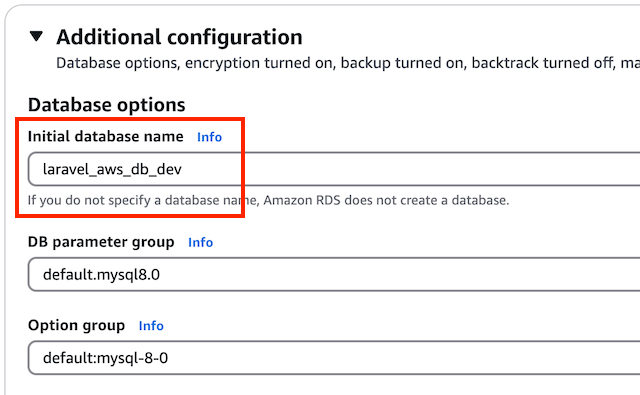
Scroll down until "Additional Configuration" section and set a database name, we need this value to configure our .env file later.
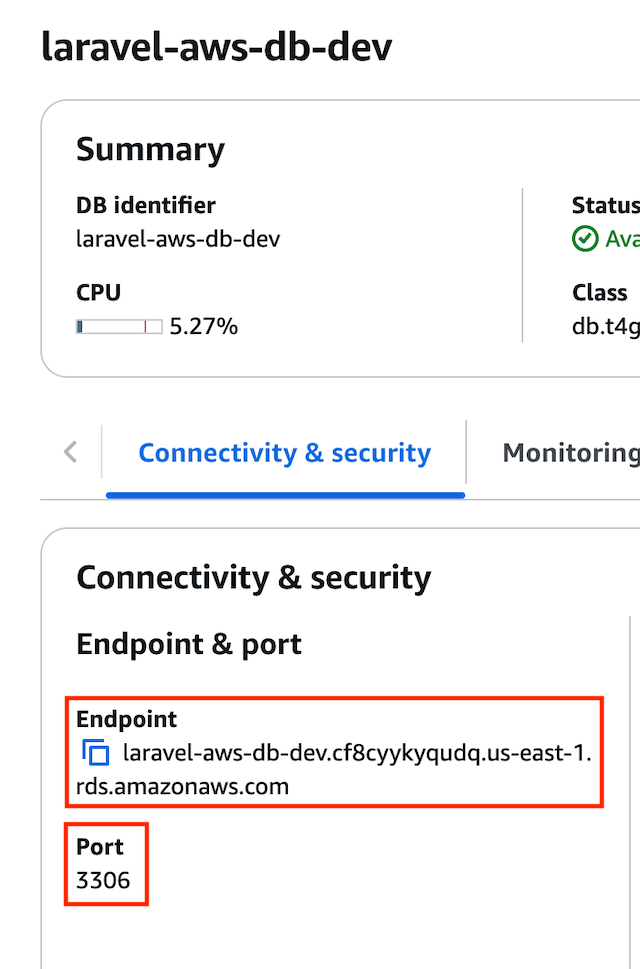
Once your Database is setup and available, change to the "Connectivity & security" tab, you need to copy Endpoint value, this is our DB_HOST in the .env file.
Connect to your EC2 instance via SSH and change to your Laravel Project directory, edit your .env file, you need to configure DB_ variables based on the values you just set.
DB_CONNECTION=mysql
DB_HOST="laravel-aws-db-dev.cf8cyykyqudq.us-east-1.rds.amazonaws.com"
DB_PORT=3306
DB_DATABASE="laravel_aws_db_dev"
DB_USERNAME=lrvl_db_usr_dev
DB_PASSWORD=12345678
To test that all DB_ variables had being set correctly and access to our RDS is successful, check the migrate:status artisan command, to confirm no migrations table found.
# confirm that connection is correct
php artisan migrate:status

# run migrations
php artisan migrate
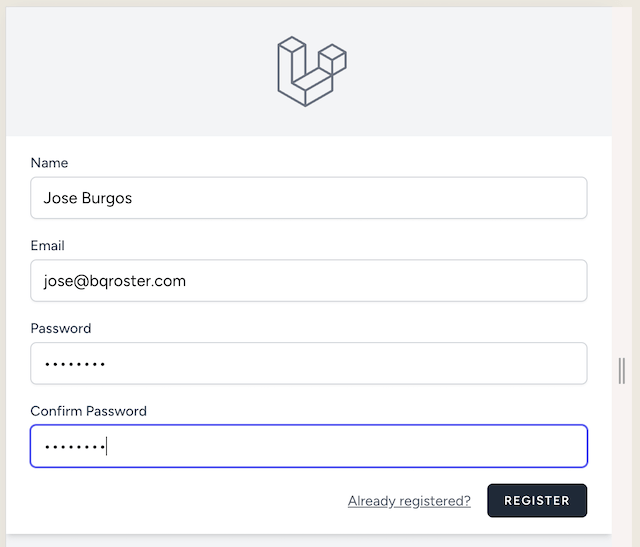
Now open your browser using EC2 public ipv4 address and your Laravel App should be visible, click on Register button, and register a new user, to confirm this user is in our database, you cannot using MySQL Client in your SSH session.
Confirm migrations and users table data after register
sudo apt install mysql-client-core-8.0
mysql -h laravel-aws-db-dev.cf8cyykyqudq.us-east-1.rds.amazonaws.com -P 3306 -u lrvl_db_usr_dev -p
Enter password:
Welcome to the MySQL monitor.  Commands end with ; or \g.
Your MySQL connection id is 37
Server version: 8.0.40 Source distribution

Copyright (c) 2000, 2025, Oracle and/or its affiliates.

Oracle is a registered trademark of Oracle Corporation and/or its
affiliates. Other names may be trademarks of their respective
owners.

Type 'help;' or '\h' for help. Type '\c' to clear the current input statement.

mysql>
mysql> use laravel_aws_db_dev;
mysql> show tables;
+------------------------------+
| Tables_in_laravel_aws_db_dev |
+------------------------------+
| articles                     |
| cache                        |
| cache_locks                  |
| failed_jobs                  |
| job_batches                  |
| jobs                         |
| migrations                   |
| password_reset_tokens        |
| sessions                     |
| users                        |
+------------------------------+
10 rows in set (0.00 sec)
select * from users;

We have confirmed migrations and data is sucessfully created, now we can create as many migrations that our Projects needs, deploy to our instance and keep migrations up to date using a RDS service.
Terminate EC2 Instance and remove RDS MySQL database after tutorial
Once you complete this tutorial if you do not need the EC2 instance anymore, please terminate the instance, so you do not incurr in Billing cost for your Instance and your EBS Volume.
If you only stop the instance, EC2 will NOT incurr in Billing cost, but your EBS Volume will be charged, so the best thing to do is terminate so you will not get any type of Billing charges, also you can create a snapshot of your EBS Volume if you need later, check real quick about how to avoid or eliminate billing charges.
Let me know on my social websites, if you got questions, comments, any positive feedback is always welcome!